Give us a call: 763-220-3765
A Maple Grove homeowner needed a clean, end-to-end 3/4 bathroom fixture set installed in their home. That meant new compression stops on every supply line, a new faucet and drain with proper testing, a Delta shower trim kit with the temperature limit stop set correctly, and a new Gerber toilet flushed five times to verify there were no leaks. Our licensed plumbing team finished the install, cleaned and vacuumed out the vanity cabinets, and hauled the debris away before leaving. If you live in Maple Grove or the surrounding Northwest Twin Cities metro and you want a 3/4 bath project handled the right way, call First Class Plumbing at 763-220-3765.
Before walking through the project, it helps to clear up the terminology. Most homeowners in Maple Grove use the phrase "3/4 bath" without knowing exactly what it means in terms of plumbing scope.
A 3/4 bathroom has three fixtures: a toilet, a sink, and a shower. A full bathroom has four: toilet, sink, shower, and a separate bathtub. A half bathroom (sometimes called a powder room) has two: toilet and sink only.
The 3/4 bath is the most common configuration in second bathrooms and finished basements across Maple Grove, Plymouth, and Brooklyn Park homes. It gives the user everything they need to get ready in the morning without taking up the floor space a full bath requires. The fixture install scope on a 3/4 bath is generally faster than a full bath because there's no separate tub to plumb, but every connection still has to be done correctly. Bob Vila has a helpful overview of bathroom types if you want more background on the differences.
The homeowner wanted three things replaced in a single visit:
That sounds straightforward on paper. The difference between a good install and a bad one comes down to the testing, the small details, and the cleanup. Here's what we did, step by step.
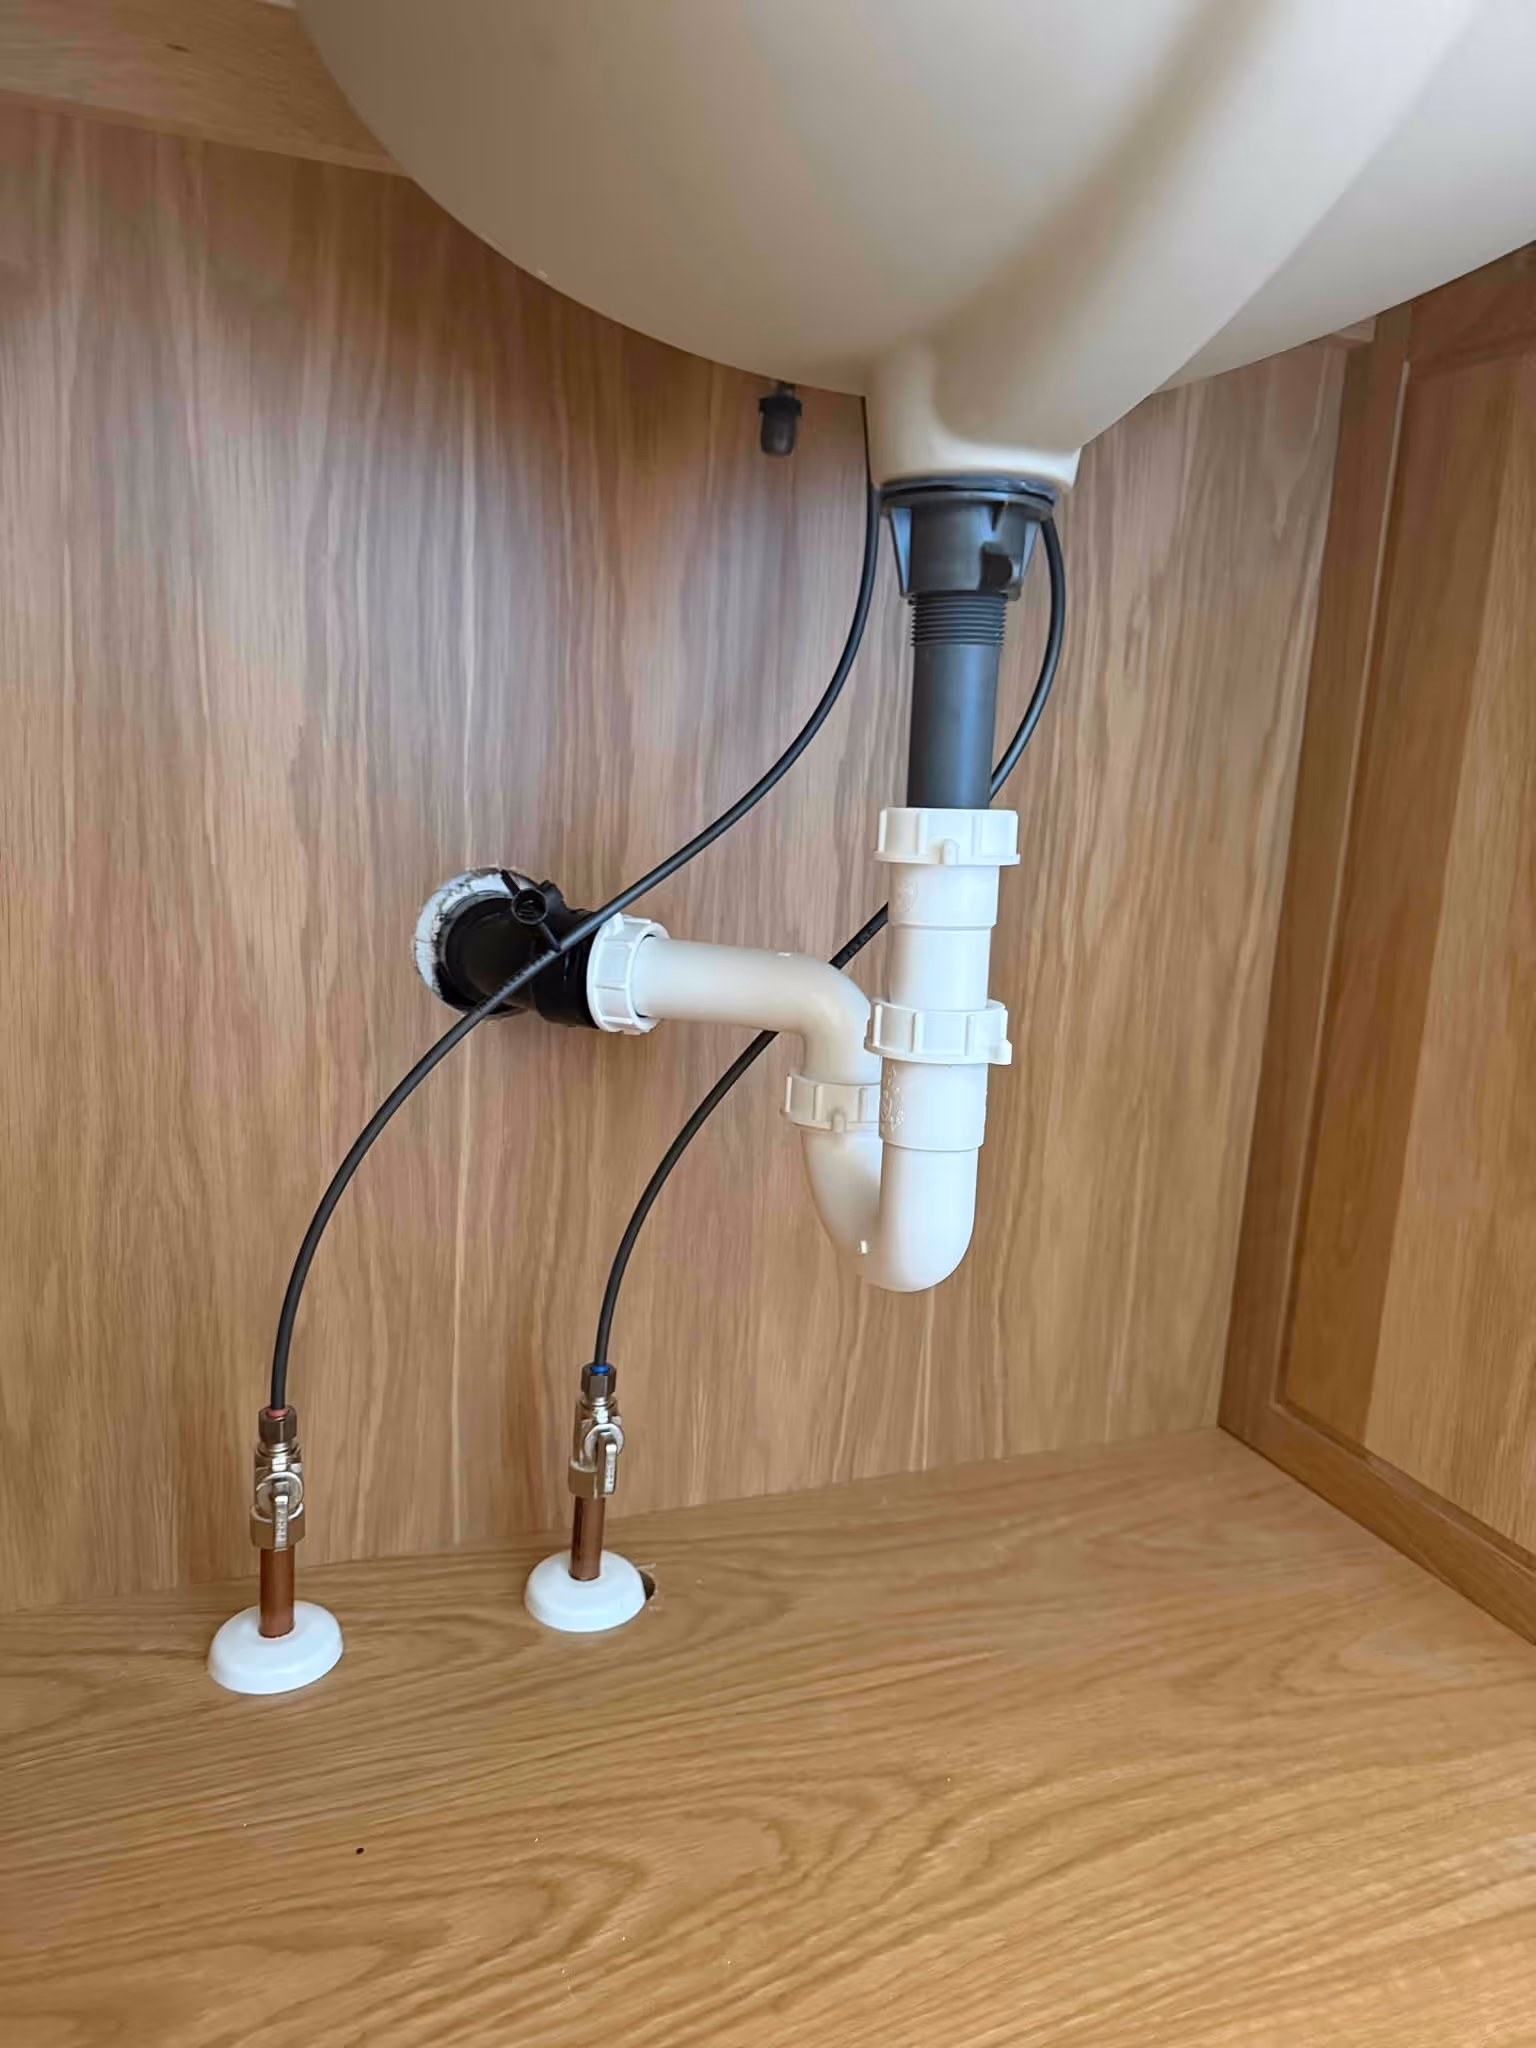
The first step on any fixture project is dealing with the shutoff valves under the sink. These are called compression stops, and they're the small valves that let you turn off water to a single fixture without killing water to the whole Maple Grove home.
We installed new compression stops on both the hot and cold supply lines, then connected the new faucet supply lines to those stops. Why replace the stops instead of reusing them? Old compression stops corrode, seize up, and sometimes fail the moment you try to turn them off. A new fixture deserves new shutoffs. If the homeowner ever needs to isolate that sink in the future, the valves will actually work.
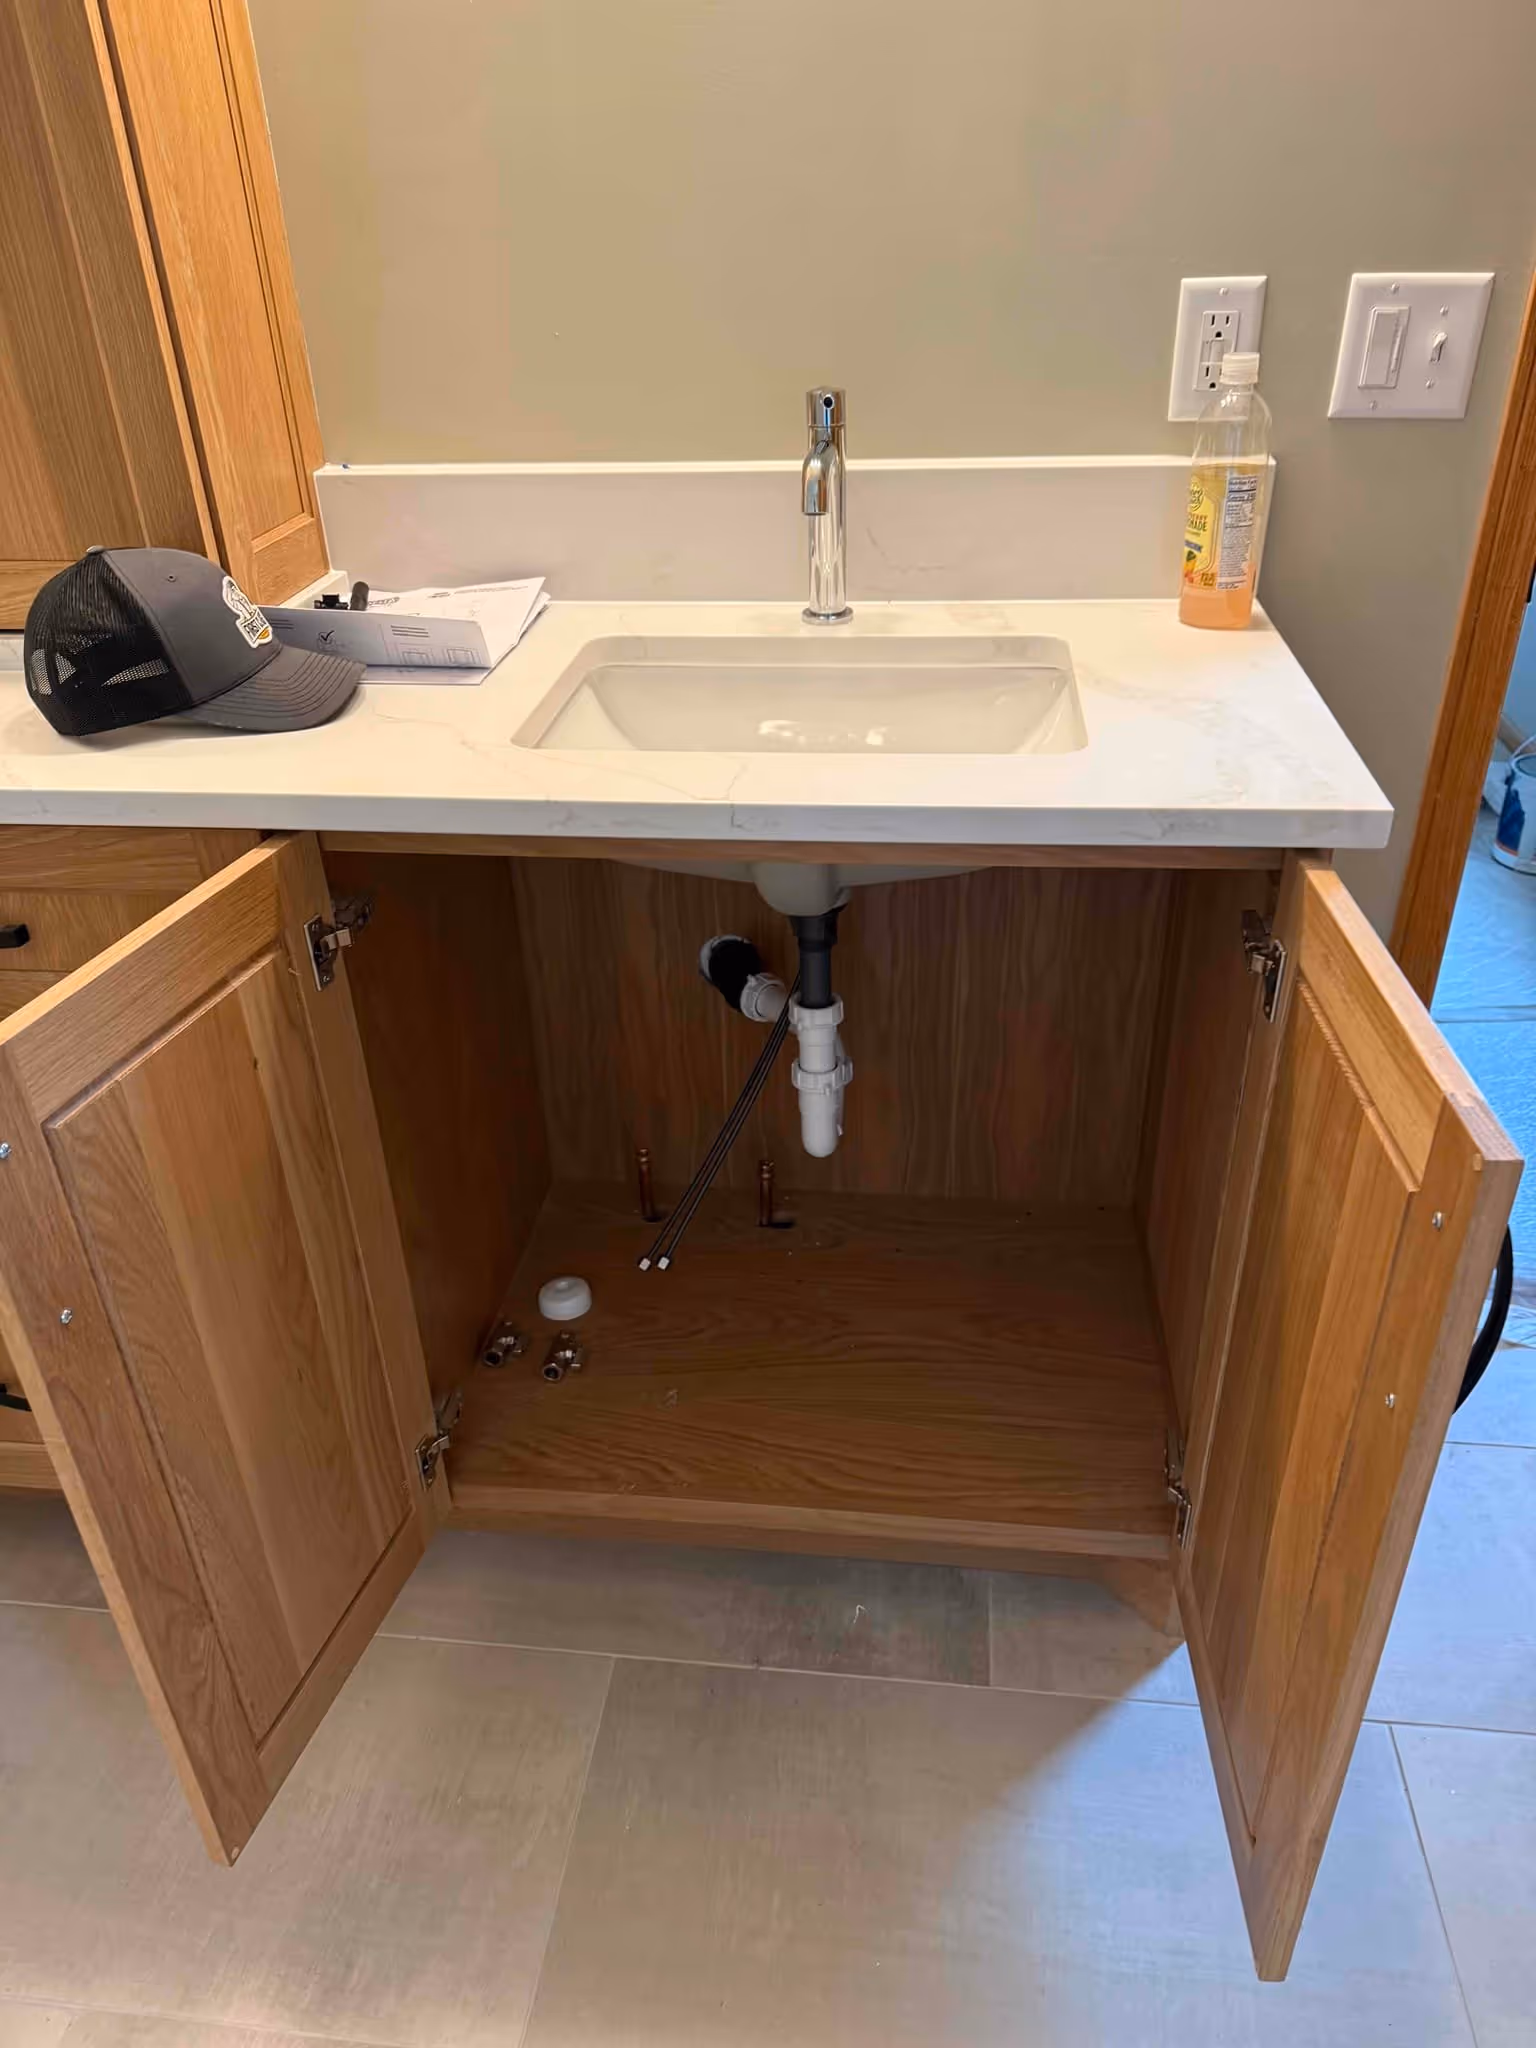
After installing the faucet itself and connecting the drain assembly, we tested by filling the sink and dumping it five times in a row. Five fill-and-dump cycles is the standard we use because slow drips at the P-trap connection often don't show up on the first or second test. The water has to sit in the trap for a minute or two before a marginal joint reveals itself.
If you want a deeper read on faucet issues that come up over time, our blog on how to stop a leaking faucet and the common causes behind it walks through what fails first and why. The faucet and sink installation service page covers what a proper install looks like in any Maple Grove home.
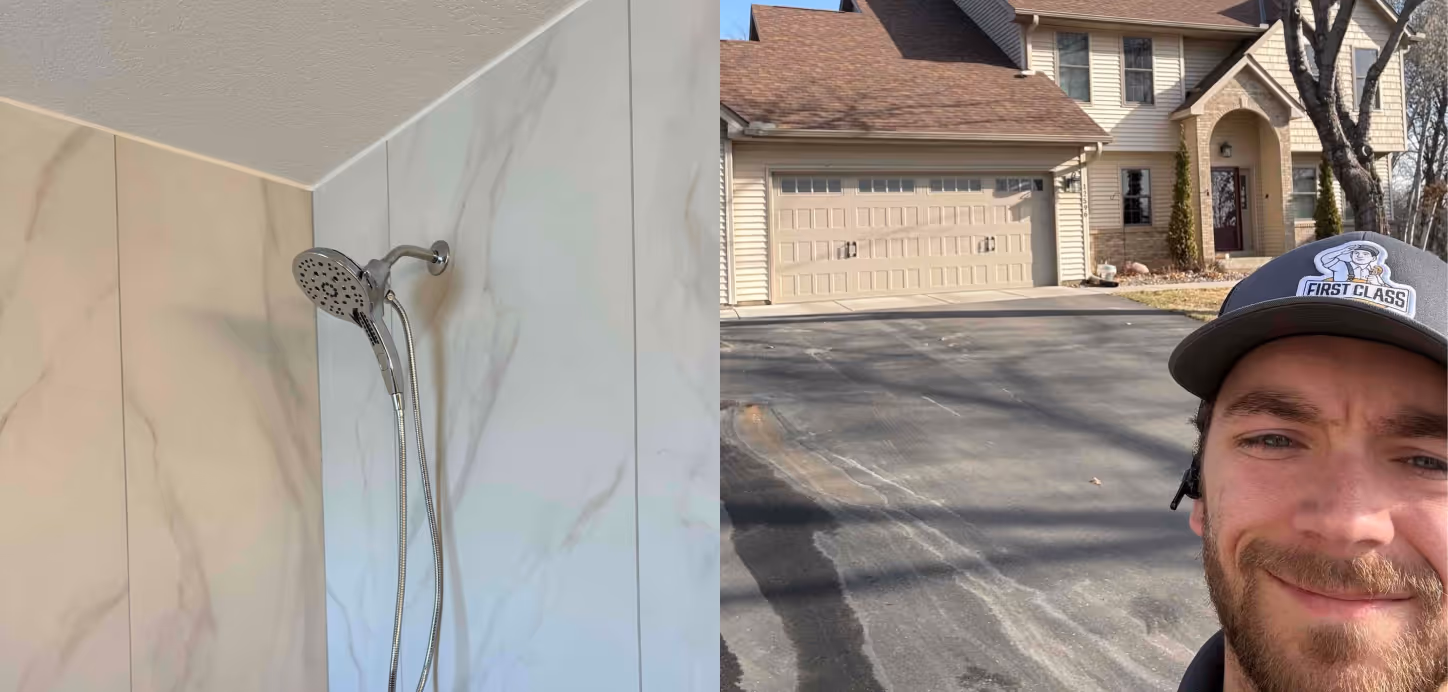
Delta is one of the more reliable shower trim manufacturers on the market, and this homeowner picked a solid kit. Installing a shower trim correctly is more involved than most homeowners realize. There are six different places a single trim kit can leak from, and a licensed plumber checks every one of them.
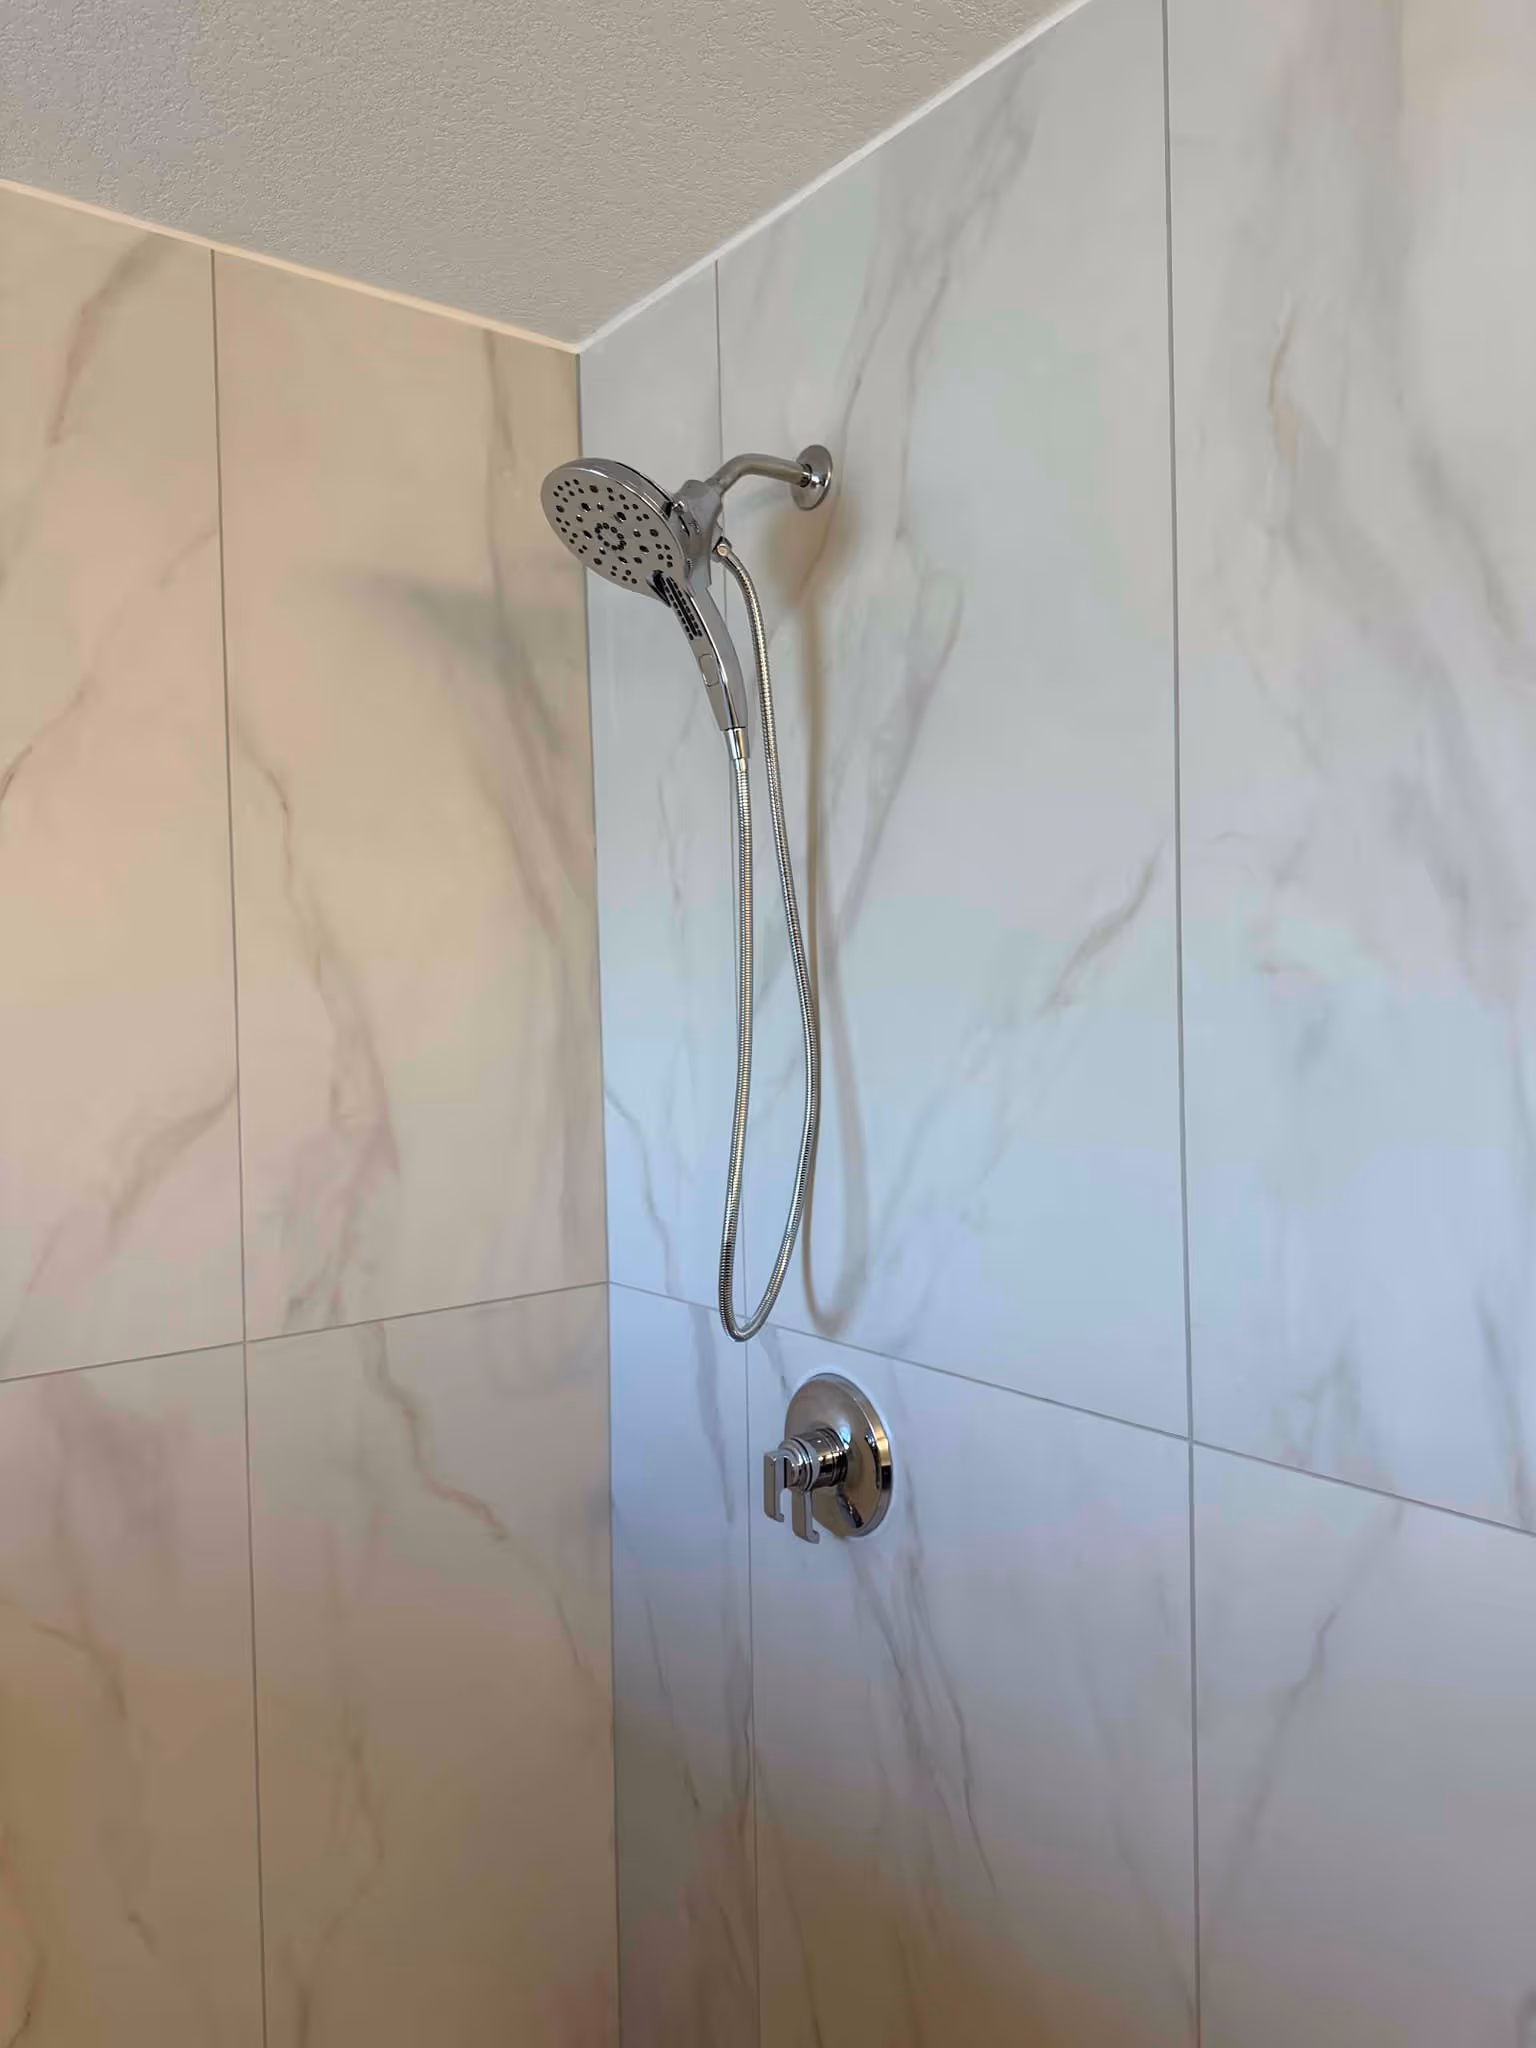
The temperature limit stop matters more than people realize. Modern mixing valves have a small adjustable stop that limits how far the handle can rotate toward "hot." Set it too high and the shower can scald someone. Set it too low and there's never enough hot water. We set it to the position the homeowner preferred during the test run.
The silicone bead on the faceplate is one of those small details that separates a good install from a bad one. Without that seal, water can find its way behind the trim and start damaging drywall or tile backer behind the scenes. By the time you notice the damage, you're already looking at a remodel.
For more on this kind of work, our shower and tub plumbing service page details what we do across Maple Grove and the rest of the Northwest Twin Cities metro. Mr. Rooter has a useful breakdown of shower valve types if you want background on how mixing valves work.
Toilets seem simple. They are not. A toilet install has more potential failure points than most homeowners would guess, and the test sequence is what catches problems before they become floor damage.
The Gerber toilet was set on a fresh wax ring, bolted to the floor flange, leveled, and connected to the supply line through a new shutoff stop. Then we flushed it five times in a row.
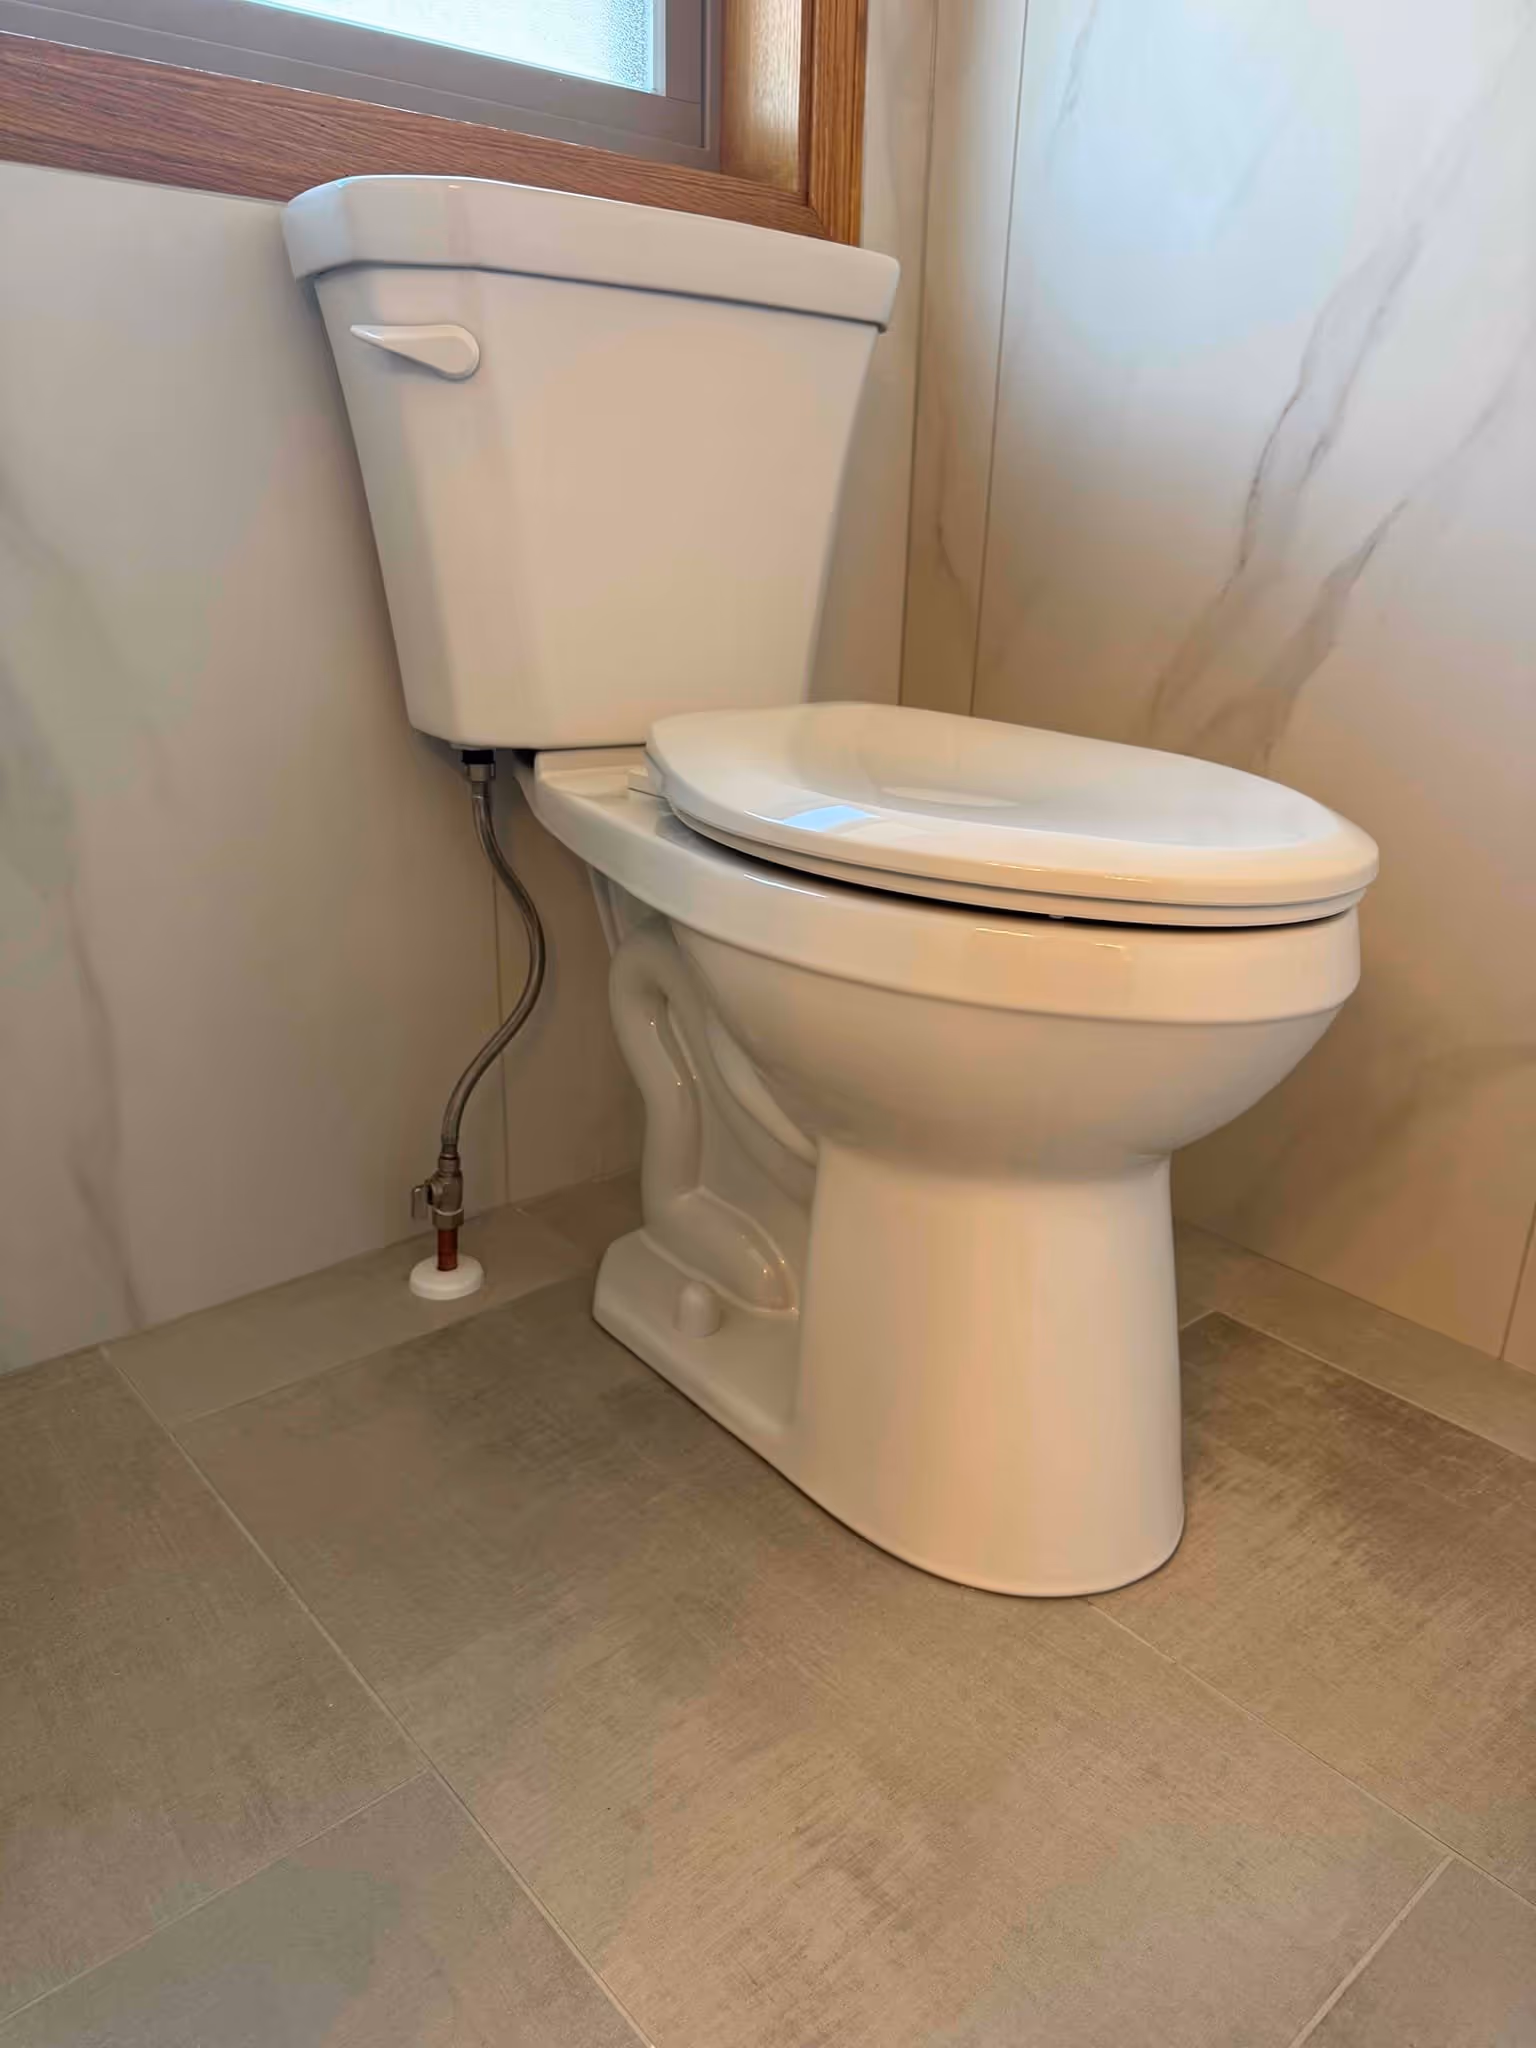
After the toilet passed all five flushes, we ran a bead of silicone around the base. Sealing the base is a topic plumbers debate. Some seal it for sanitary reasons because water and waste from a failing wax ring shouldn't be sitting under a toilet. Others leave the back unsealed so any future leak would be visible. We seal it because Minnesota's plumbing code in most jurisdictions treats the base as part of the sanitary perimeter. If you want to read more about toilet issues and how to spot problems early, our blog on why a toilet keeps running constantly is a good starting point.
For homeowners considering a fixture replacement or a full upgrade, our toilet installation, repair, and replacement service page covers the full scope of what we do across Maple Grove homes.
This isn't standard practice for every plumbing company in Maple Grove, but it should be. When a plumber works under a vanity, debris ends up in the cabinet. Bits of old plumber's putty, copper shavings, drops of pipe dope, paper backing from the new fixture box. If we don't clean it up, the homeowner finds it the next time they go looking for their cleaning supplies.
We cleaned and vacuumed out the vanity cabinets before we packed up. Then we hauled the old fixtures, packaging, and debris away. The homeowner shouldn't have to deal with our mess after we leave. That's part of what being treated with integrity by your plumber looks like, and it's the reason we do this work at all.
This is one of the reasons we wrote about the hidden dangers of DIY plumbing repairs in Maple Grove and when to call a professional. The cleanup, testing, and code awareness that a licensed plumber brings to a job are part of what you're actually paying for.
A 3/4 bath fixture set is the kind of project a confident DIYer in Maple Grove might try to handle on their own. Sometimes it works out. Often it doesn't. Here's what a licensed plumber brings that a YouTube tutorial doesn't:
Our blog on why hiring a licensed plumber for a bathroom remodel saves you money goes deeper on this question. For broader context on Minnesota code, the Plumbing-Heating-Cooling Contractors Association has resources on what licensing actually covers. Our bathroom remodeling plumbing service page covers the kinds of bathroom work we routinely handle in Maple Grove.
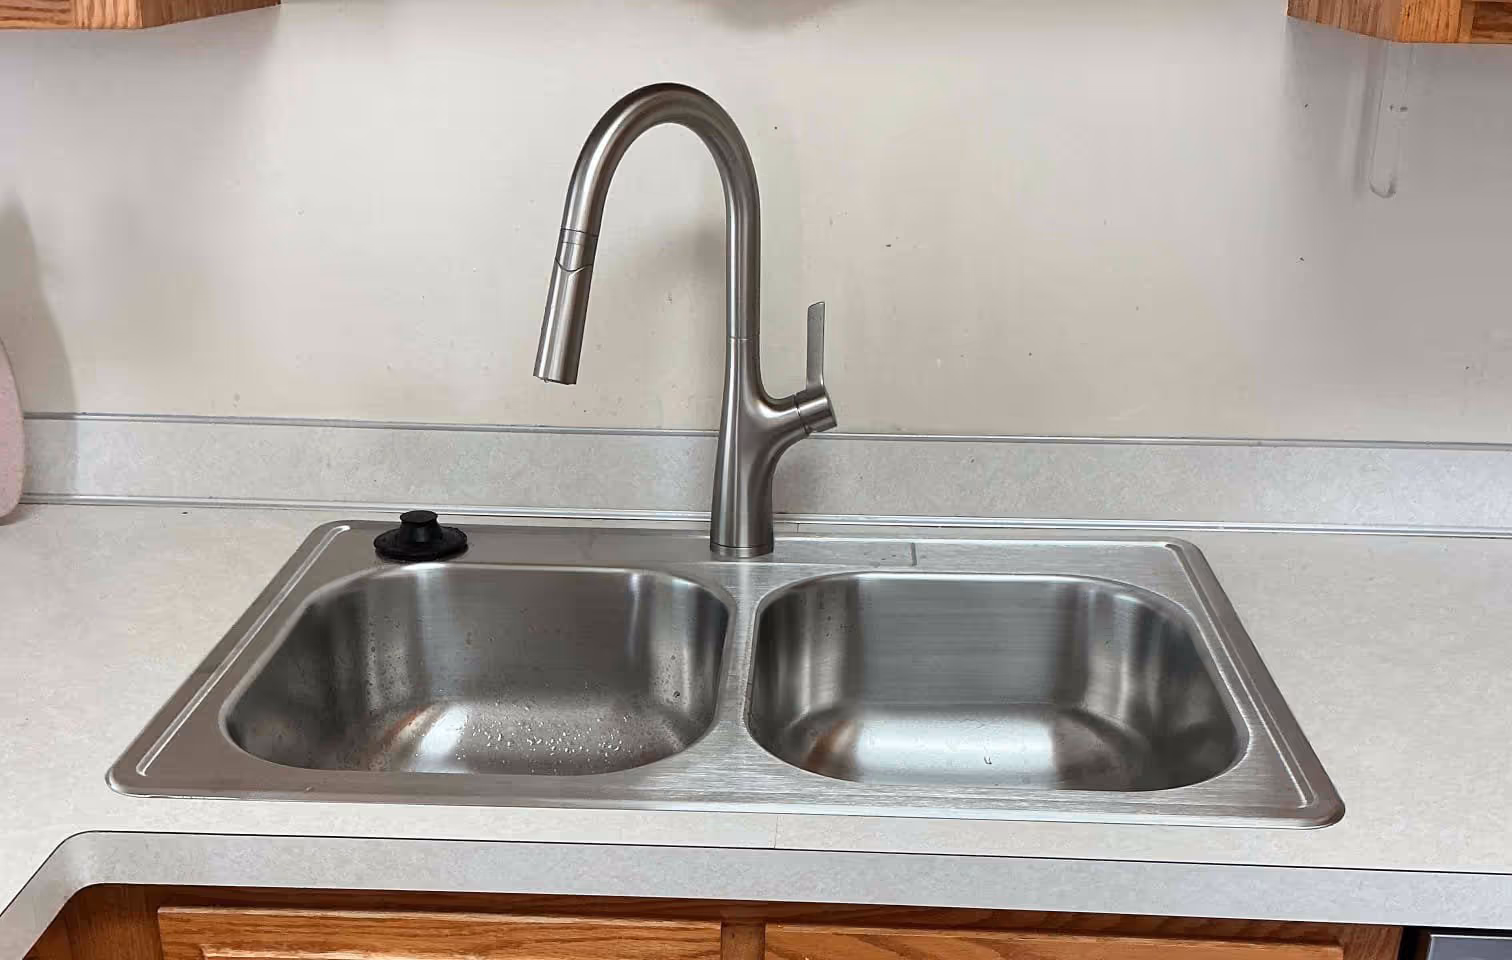
A homeowner on Yew Point in Eagan wanted to replace an outdated, malfunctioning kitchen faucet with a hassle-free upgrade. Here's exactly how our licensed plumbing team removed the old setup, inspected every connection, installed the new sink and faucet, and tested everything before driving away.

What we check during a whole-home plumbing inspection in Maple Grove, why it comes free with every service call, and the small problems we catch before they cost you thousands.

Chlorine, sodium, and what your softener does to drinking water. A Maple Grove plumber explains when to add reverse osmosis filtration to your city water.

Find out what is actually in your Maple Grove water. A licensed plumber explains the 15-contaminant sample test, what red yellow and green results mean, and your treatment options.

Pre-purchase sewer camera inspection in Eden Prairie, MN. 118 feet documented, line cleared to close.

Kitchen, bath, and gas line install in Saint Michael, MN. Passed city inspection same day (3:25 PM).